
Green Beans
No kids' garden is complete without
at least one bean plant. Purpose: to grow good beans for eating, but also to
put on a "Jack and the Beanstalk" play some time during garden season. You can
grow your own crop . . . and grow your own PROP. (Just a little bit of garden
humor there.)
Green beans are a wonderful source
of nutrition, especially providing vitamins, minerals and fiber. The plants
practically grow themselves from seed in just about eight weeks. What's funny
about green beans is that they are actually young and unripe - or "green" -
when they are at their tastiest. We eat them before they ripen, because they
are too hard to chew after their early stages.
There are other kinds of beans, such
as the beans used in baked beans and chili, which are allowed to stay in the
garden or field until they are fully ripe. Both the beans and the pods that the
plant produces are dry and hard. They are easily stored and don't have to be
frozen, but you have to cook them gently for a long time to soften them up.
Next time you go to the grocery store, handle the packages of dry beans such as
kidney beans and pinto beans, and see what they are like.
But most kids' gardens will grow
green beans just because you can eat them sooner, and right off the plant, too!
Your parents and grandparents
probably remember "string" beans, which were green beans with a long, tough
string along one side to connect the bean to the stem. Food science has
developed more "snap" beans today, which are easier to harvest, and you don't
have to cut off the string. Take a fresh green bean and break off the two ends.
Hear the "snap"? That's why they're called that!
The variety is amazing. You might
like the long, skinny kinds or the short, broad kinds. You might like to try
heritage beans for more intense flavor, or a different color, such as yellow or
purple. You could try growing shell beans, or edamame (edd uh MOM ee), but we'll do a separate article
about them on www.KidsGardenClub.org.
The biggest challenge you will face
is whether to grow bush beans or pole beans:
1.
Bush
beans, true to their name, grow as knee-high bushes in the garden. The beans
look just the same as those produced by a pole bean, but you don't need a pole
or support because the bush beans support themselves. Check the back of the
seed packet for how much space to leave around each bush bean seed you plant.
2.
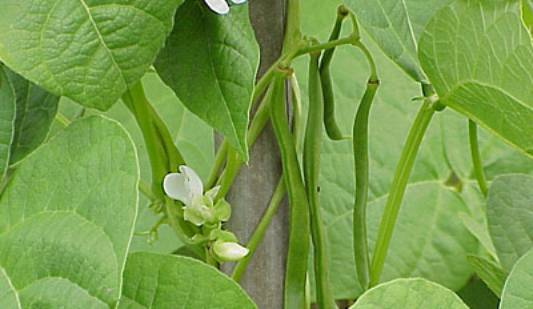
Pole
beans, on the other hand, have weak but very fast-growing stems. The stems like
to lean upon the support of a fence or curl up a tall pole. The beans look just
the same as the beans produced on a bush bean plant. The vine will grow to 10
feet or more. If you are using bamboo poles or other supports, you can plant
pole beans one or two feet apart, but leave room on either side for picking!
Choose one or both styles, depending
on how much garden space you have, and whether you have a fence, poles or other
supports for pole beans. Choose a spot that gets full sun all day for best
results.
Be sure to wait to plant the seeds
until after all risk of frost has passed. In the Midwest and North, that's
usually around Mother's Day. Look at the weather forecast beginning May 1 and
plan accordingly. It's usually about 60 days to harvest. Bush beans bear for two
or three weeks and then they're done; you can pull them out and plant something
else in that space for a fall crop. Pole beans start bearing a little later and
keep going until frost in the fall.
Planting day: cultivate the soil
well and add a few handfuls of compost or bone meal, mixing well.
It's a good idea to put a wooden
craft stick or plastic straw in the ground an inch or two away from each bush
bean seed so that you can watch for seedlings and pull any weeds that might
sprout up.
Also, push your poles into the
ground about 8"-10" and make sure they are sturdy BEFORE you plant the pole
bean seed about an inch away. If you are going to train your pole bean vines
onto a fence, plant the seeds pretty close to the fence and then, after the
seedlings have developed four or five leaves and the vines are long enough,
gently place the vines onto the fence so that they'll start growing on it.
Planting note: don't plant bean
seeds in cold, wet soil. If it has rained, wait a day or two until the soil has
warmed back up and dried to a nice, barely moist, crumbly stage. Otherwise,
your bean seeds might rot before they even get going.
Throughout the growing season, don't
come near your bean plants after a rain, or when they are wet. Always water
them at ground level, not from above. This is because thin, delicate bean
leaves are very susceptible to diseases, and you sure don't want to spread
them. Try to keep your bean leaves dry as best you can, but don't forget to
water the roots as needed, just about every other day.
As the little bean vines begin to
sprout and grow, start checking your plants in the afternoon for bean leaf
beetles. They look like ladybugs, only a little longer and less round, with
yellow or light green shells, and a black triangle right behind their heads. Pick
them off and kill them, either by squashing them with your hand, or dropping
them into a jar of water shaken up with a tablespoon of Dawn liquid dishwashing
detergent.
If you see a copper-colored bug on
your bean plants, it's likely a Japanese beetle, and these must also be
hand-picked and discarded. You can also buy a trap at a garden or hardware
store that you leave out in the garden, on a pole, to attract these beetles
away from your plants.
If your crop looks damaged or the
leaves are wilting, and you don't see any bugs, you might bring a sample of a
leaf in to a garden store to see if you have another pest, such as spidermites.
Try to find an organic way to control for them, but if you must spray a
pesticide to protect your crop, then make sure to wash the beans very well
before you eat them.
It's fun to see how quickly the
little green bean sprouts lengthen, in a matter of hours, so enjoy harvesting
beans almost every day. The little-to-medium ones are the tastiest. Pull off
and discard any that you missed and that have gotten big and dry, to encourage
the plant to produce more.
And about that "Jack and the
Beanstalk" play idea - when your pole beans are gigantic, it's really fun to
put this together, especially if you can invite some preschool children! See: http://gardening.afterschooltreats.com/wfdata/frame134-1012/pressrel11.asp
If you stick to organic garden
methods, without any chemicals, then you can eat a warm bean right off the
plant in the garden! Cooking them is easy, too. There's nothing like the taste
of fresh-picked green beans, gently steamed over boiling water, and topped with
just a little butter, salt and pepper. But you can also wash and freeze them
for long-term storage. Steam them for about two minutes first, let cool and
dry, and then freeze in a labeled zip-lock bag. Best to eat them within three
months.