
Sweet Potato Slips
Supplies:
One or two sweet potatoes from a grocery store or farmer's market
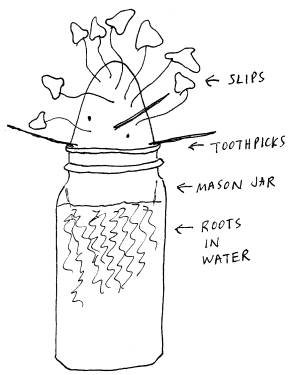
3-4 toothpicks | Mason jar (canning jar) | water
Phase II: shallow container of water, such as a bowl
Sweet
potatoes, also called yams, are a healthy and tasty treat. Sweet potato pie!
Sweet potato fries sprinkled with cinnamon and dipped in mustard! Baked sweet
potatoes with a little butter and brown sugar! Mmmmm!
You don't
need seeds to grow sweet potatoes - you can start your own from a "mother"
plant. Since sweet potatoes grow best when it's getting hot out, do this in
mid-April so that about four or five weeks later, in mid-May, when daytime
temperatures are getting warmer, you'll have lots of baby plants ready to plant
outside.
You might
get more sprouts if you use a home-grown sweet potato from the year before. If
you didn't grow them and store them the year before, you can buy sweet potatoes
at many Farmers Markets.
Why? Because many sweet potatoes
offered for sale at grocery stores have been sprayed with a safe and totally
edible chemical intended to keep them from sprouting while in storage. While
store-bought sweet potatoes still will sprout for you with this method, you
probably will get more sprouts from a home-grown variety.
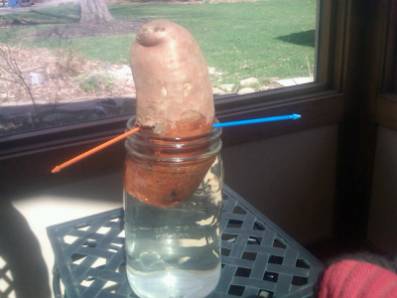
Here's one just started . . .
toothpicks hold the tater in place.
Each sweet
potato makes about 6-8 baby plants this way, and you plant them 18 inches away
from all other plants. If you don't have a lot of garden space, you'd better do
this with just one potato . . . or you'll be OVERRUN WITH VINES!!! AAAIIIEEE!!!
Simply fill water almost to the top
of a Mason jar (clear glass canning jar). If you're using a small sweet potato,
use a pint-size jar. If it's a big "honker," use a quart-size jar.
Cut the
sweet potato in half. You can either eat the other half, or get two jars and
double up, putting one end in each container.
Stick toothpicks near the cut edge
of the sweet potato half so that the surface of the sweet potato is under
water. About one-fourth of the sweet potato should be under water, and
three-fourths above water. Set the jar or jars on a sunny windowsill in a warm
room.
That's it! Now have fun watching or
the little shoots rise. It may take about two weeks for them to appear, and
another two weeks for them to grow very long. Be patient.

When they are about 6 inches long
(use a ruler to measure!), gently twist them away from the potato. Don't worry
that there are no roots for these slips - that's what Phase II is all about.
Lay the 6-inch shoots sideways into
a shallow container of water so that only their bottom halves are immersed. The
top halves can lean over the side of the bowl.
A few days later, you should see
roots begin to grow. When they are an inch long, it's time to plant outside!
Go online for instructions on caring
for sweet potatoes, and look forward to a bumper crop of 8-10 sweeeeeeeeet
treats per plant.