PUMPKIN PUREE
Your
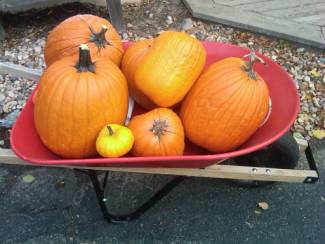
Own Fresh, Homegrown Pumpkin
Is
Tasty in Pumpkin Pies, Bars, Muffins, Breads and Soups
It's
unbelievable how much yummier homegrown pumpkin is that storebought, canned
pumpkin. Congratulations if you grew your own!
Here's
how to preserve your harvest and use every ounce of pumpkin goodness.
You
will need a food processor to make puree, or you can use a potato masher or
ricer.
You can
store pumpkins in a warm, dry place, such as the basement, for a couple of
months after harvesting them. But if you don't have room, or want to use
pumpkin squash in foods right away, make this easy puree (pronounced pure - AY).
Use
some now, and freeze the rest for up to 1 year.
1.
Best to grow pie pumpkin or sweet pumpkin, but you can
use a jack o' lantern style pumpkin - it just may be a little more watery.
2.
First, wash the outside of the pumpkin with cool, running
water. Rub off any dirt with a soft cloth. Rinse and dry.
3.
Using a big knife, with adult supervision, cut the
pumpkin in half.
4.
Save the pumpkin seeds - rinse and let dry. They make a
great snack later, toasted with a little salt.
5.
Throw away the stringy, yucky pulp. Use the side of a
large spoon to scrape all of it away from the pumpkin shell. The shell should
be almost dry.
6.
Cut the two pumpkin shells into fairly large sections.
7.
You can either put a cup of water in the bottom of a
large pot and put the pumpkin sections on a steamer rack . . . or . . .
8.
. . . put them in a large pot with a cup of water over.
Either way, you will "steam" the pumpkin sections over, or in, just a little
water, rather than cover them up with water. This will keep the nutrients
inside.
9.
Put the lid on the pot, heat on medium-high heat 'til the
water boils, and then reduce heat to a simmer. Simmer for 20-30 minutes.
10.
You should be
able to poke through the pumpkin shell with a fork very easily.
11.
Drain the pumpkin
sections over a colander. Keep the liquid from the bottom of the pan and under
the colander; it makes a great base for soup or gravy.
12.
Once the sections
have cooled, remove the peel by pulling it off with your fingers, and throw
away. You may need to use a small, sharp knife, but have adult supervision.
13.
Now just put the
sections in a food processor, and process on the "puree" setting. If you don't
have a food processor, mash the pumpkin with a potato masher or ricer, or the
back of a big spoon, and stir 'til it is the consistency of mashed potatoes.
14.
Use any puree you
want to right now for pumpkin bars, pumpkin pie, pumpkin bread, pumpkin muffins
. . . mmmmm!
15.
To save extra
puree for up to a year in the freezer, measure out one-cup portions of the
puree and put into quart-size, zip-lock freezer bags. Use a plastic straw to
suck all the extra air out of each bag before you quickly zip-lock seal it.
Label each bag: "Pumpkin Puree; Use By _____" and put the date that is one year
from today. That's how long your pumpkin puree can stay in the freezer.
16.
To freeze, lay
each sack out in a flat square on the freezer rack. They can be on top of each
other. If they freeze flat, in a square shape, they will be much easier to
store long-term than if they are in a rounded blob.
-- www.KidsGardenClub.org


