
Worm Ranch
Supplies:
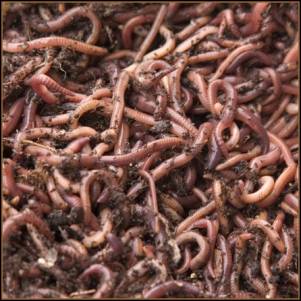
Purchase red wrigglers from a bait shop, or look online for a "worm
farm" source near you
2-3 bags of bagged compost or aged manure
Worms like a wood container better, but one or more 30-gallon old plastic
garbage cans, plastic storage tubs, or smaller-sized drywall buckets, will work
fine
Don't use your container's lid -- make a framed lid with screening or
moistened burlap for the top to allow for good air flow but still keeping the
top humid
Blocks under the bottom of the container so air can get in through the
vent holes
At least 1 cubic foot of space per pound of worms
Drill that can make quarter-inch holes in the bottom and sides of your
container
Some kind of tray or plastic receptable under the bin to collect "worm
tea," the run-off after watering the bin, which makes a great fertilizer
A million of them could live in an acre of soil. They
can "eat" their own weight in soil and organic waste every day. As
they "worm" their way through the soil, they open up tunnels where oxygen can
go. Their movements loosen up the soil underground, making it easier for roots
to grow. Best of all, their "poop" enriches the fertility of soil like no
other! They eat dirt and bugs . . . and leave the soil behind them much
improved for plant life.
Worms are nature's power recyclers! And you can grow
your own to improve your garden soil and have fun investigating these amazing
creatures. It takes at least three months to create worm compost. It's better
to start a worm ranch in the spring, keep it going all summer and into the
fall, and release your worms "into the wild" in mid-fall in your garden. Then,
next year, you can "visit" them all the time, though some will migrate away
from your garden, and that's OK, too.
Start collecting worm food - compostable kitchen
scraps. Order your worms, and get the bin ready before they arrive.
A kids' garden club could start by assigning each
student to collect veggie scraps with a compost bin under the kitchen sink for
a couple of weeks. Then come together to fill one or more prepared containers
with a few bags of store-bought compost or dug-up dirt, your club's compost,
and then the stars of the show - either worms that the kids dig up here and
there, or better yet, mail-ordered red wrigglers that you "let loose" in your
ranch to grow, eat the compost, have babies, and become Worm Nation that you
can eventually turn loose in your garden.
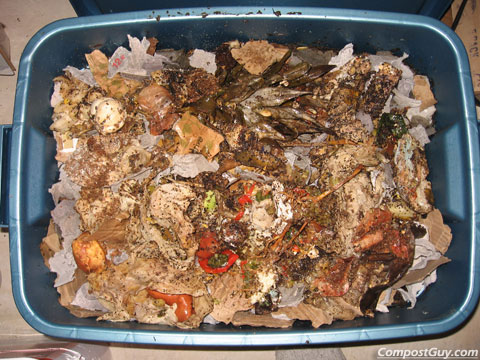
Composting is a great
way to help the environment and get free food for your worms. Each student can
ask parents to commit to putting a plastic storage container under your kitchen
sink and start collecting potato peels, cut-up banana peels, coffee grounds,
crushed eggshells (important - worms need calcium!), chopped up apple cores and
other compostables. No meats, dairy, breads, processed foods such as potato
chips, or other garbage. Absolutely no salt! Worms don't seem to like citrus
fruits or peels. The students can bring in their containers when full to add to
the worm bin.
Also helpful is
newspaper cut in 1" wide strips and moistened, torn-up paper napkins, or
crushed dry leaves or sawdust, also moistened.
If you really get in
to it, you can organize a compost collection system at lunch in your school.
Your garden club can set up a 4' x 8' worm bin near the school garden, and set
up a system in which the student body is educated on what kinds of lunch scraps
make good worm food. For example, no meats, cheeses or breads - but bring on
the banana peels, apple cores, crushed eggshells, coffee grounds, and so forth.
Also good are shredded newspaper and colored paper. Your club can collect,
weigh, process (chop up small) and chart food waste daily, adding water as
needed to keep it moist.
You might want to pick a spot for your worm ranch
that is in the shade, for worms do best at about 65 to 75 degrees, and can
"fry" in too hot and sunny of a spot. If your area gets into the 80s and 90s
often, you might consider moving the bin inside for a while.
It is important to drill or poke about 20 ventilation
holes about a quarter-inch wide in the top bottom of your worm bin, and every
few inches in the sides, to let in air and let water out. Don't worry about the
worms escaping; they won't, if there's food in the bin.
You don't want to completely fill your container, for
it will be too heavy to move.
For quantities, try to have half compost or aged
manure, and half collected kitchen waste or other materials. You want the
worms' environment to be slightly moist, but not soggy and wet, like a
wrung-out sponge. So you need good drainage, and you probably don't need to add
water often. You should collect the "worm tea" - brown runoff water - from the
bottom by putting your bin on bricks or blocks in a big waterproof tray or
trough. That "worm tea" is a great liquid fertilizer for other plants.
Fill the container about one-fourth full with bagged
compost or dug-up dirt, then add an equal amount of the compostable materials,
and stir. Shoot for about half dirt, half other ingredients, to help the worms'
digestion. You don't want their food to be too "rich"! Stir it up; the worms
will not want to live near the top because that's too light and too hot; they
need to have some of their food at all levels of the bin, including at the
bottom.
Every two or three weeks, add more compost or manure,
and compostables, onto the top. The worms will gradually move up to the next
level as their food supply runs out. As they convert the substance into worm
compost, it will grow fluffier and lighter. You should probably add more food
six times in a summer, every two or three weeks, or until your container is
full.
Have the students research the life cycle of the
worm, and they will discover that, when they pour their bin out onto their
garden, they are probably pouring countless worm cocoons for next year along
with the visible red wrigglers they are letting loose.
Once you get going with your worm ranch, you can do
all kinds of experiments: try finding out if worms like lighter colors or
darker colors by putting them on plates with different colors of water droplets.
The kids will find that the worms like dark colors more, and will realize that
their natural habitat is below ground, so naturally, they don't like light.
Another idea is to start and grow bean seeds in three
kinds of soil: straight potting soil, straight worm compost, and a mixture.
Then measure which plants are faster growing, have more leaves, produce beans
first, and so forth.


